

What is XML-RPC in WordPress?
XML-RPC is a remote communication protocol that allows third-party applications to interact with your WordPress site. It was introduced in WordPress 1.5 (2005) and enabled by default since version 3.5 (2012).
The xmlrpc.php file in your WordPress root directory handles these remote communications.
[Screenshot: WordPress root directory showing xmlrpc.php file]
What XML-RPC Was Used For:
- WordPress mobile apps (iOS/Android)
- Pingbacks and trackbacks
- Third-party publishing tools
- Automation services (IFTTT, Zapier)
Why It’s Outdated:
WordPress now has the REST API—a modern, secure alternative that replaced XML-RPC. The REST API uses JSON and supports better authentication methods like OAuth 2.0.
XML-RPC only exists for backward compatibility with older plugins and services.
Why XML-RPC is a Security Risk
1. Brute Force Attacks
XML-RPC’s system.multicall method allows attackers to test hundreds of passwords in a single request, bypassing:
- Login attempt limits
- CAPTCHA protection
- Two-factor authentication
- Security plugin restrictions
[Screenshot: XML-RPC brute force attack in security logs]
2. DDoS Attacks
Hackers exploit the pingback feature to launch Distributed Denial of Service attacks:
- Send thousands of pingback requests
- Overwhelm server resources
- Crash your website
- Use your site to attack others
[Screenshot: Server resources during XML-RPC DDoS attack]
3. Bypasses Security Measures
XML-RPC circumvents standard security protections:
- Firewall rules
- Login page security
- Rate limiting
- IP blocking
4. IP Address Disclosure
XML-RPC can expose your real server IP, even behind Cloudflare or other WAFs, allowing direct attacks.
Statistics:
- 24% of WordPress attacks involve XML-RPC
- Sites with XML-RPC enabled are 3x more vulnerable
- DDoS attacks can generate 50,000+ requests/hour
How to Check if XML-RPC is Enable
Method 1: Online Validator (Easiest)
- Visit: WordPress Security Scanner
- Enter:
https://yourdomain.com/ - Click “Analyze”
Results:
- Success message = Enabled (High)
- Error message = Disabled (you’re safe)
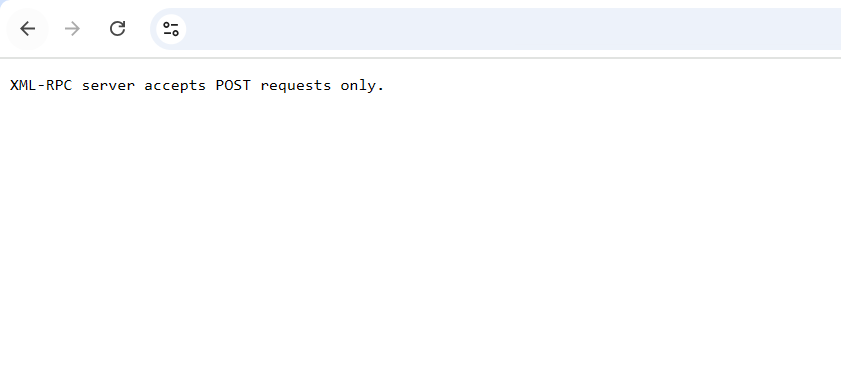
Method 2: Browser Test
Visit: https://yourdomain.com/xmlrpc.php
If enabled: “XML-RPC server accepts POST requests only.” If disabled: “403 Forbidden”
Method 1: Disable XML-RPC Using .htaccess
Best for: Advanced users Advantages: Blocks requests before WordPress loads, zero performance impact
Step-by-Step:
- Access your site via FTP (FileZilla, cPanel File Manager)
[Screenshot: FTP connection to WordPress site]
- Locate
.htaccessfile in root directory (same folder aswp-config.php)
[Screenshot: .htaccess file location]
- Download backup before editing
- Add this code at the end:
# Block WordPress XML-RPC requests
<Files xmlrpc.php>
order deny,allow
deny from all
</Files>[Screenshot: .htaccess with code added]
To whitelist your IP address:
# Block XML-RPC except specific IPs
<Files xmlrpc.php>
order deny,allow
deny from all
allow from 103.45.67.89
allow from 98.76.54.32
</Files>Replace with your actual IP addresses. Find yours at: WhatIsMyIP.com
- Save and upload
- Test your site to ensure everything works
For Nginx Users:
Add to your Nginx config:
location = /xmlrpc.php {
    deny all;
}[Screenshot: Nginx configuration]
Method 2: Disable XML-RPC Using WPCode Plugin
Best for: Beginners and intermediate users Advantages: No file editing, built-in library, safe
Step-by-Step:
- Install WPCode plugin
- Go to Plugins → Add New
- Search “WPCode”
- Install and activate
[Screenshot: Installing WPCode plugin]
- Go to Code Snippets → Library
- Search “XML-RPC”
[Screenshot: WPCode library with XML-RPC snippet]
- Click “Use Snippet”
- Toggle to Active
- Click Update
[Screenshot: Activating WPCode snippet]
Done! WPCode adds this code automatically:
add_filter( 'xmlrpc_enabled', '__return_false' );Advanced Code (Optional):
For complete protection, add this custom snippet:
- Code Snippets → Add Snippet
- Add Your Custom Code
- Paste this:
// Disable XML-RPC completely
add_filter( 'xmlrpc_enabled', '__return_false' );
// Remove XML-RPC headers
remove_action( 'wp_head', 'rsd_link' );
remove_action( 'wp_head', 'wlwmanifest_link' );
// Disable pingback methods
add_filter( 'xmlrpc_methods', function( $methods ) {
   unset( $methods['pingback.ping'] );
   unset( $methods['pingback.extensions.getPingbacks'] );
   return $methods;
});
// Remove X-Pingback header
add_filter( 'wp_headers', function( $headers ) {
   unset( $headers['X-Pingback'] );
   return $headers;
});- Set to “Run Everywhere”
- Toggle Active
- Save Snippet
[Screenshot: Custom WPCode snippet]
Method 3: Disable XML-RPC Using Plugin
Best for: Complete beginners Advantages: One-click solution
Step-by-Step:
- Go to Plugins → Add New
- Search “Disable XML-RPC-API”
- Install and activate
[Screenshot: Disable XML-RPC-API plugin]
That’s it! Works immediately with zero configuration.
Optional Settings:
To whitelist specific IPs:
- Settings → XML-RPC
- Enable for certain IPs
- Add IP addresses (one per line)
- Save Changes
[Screenshot: Plugin settings page]
Alternative Plugins:
- Disable XML-RPC by Sammy Guergachi
- Stop XML-RPC Attack
Verify XML-RPC is Disabled
Test 1: XML-RPC Validator
- XML-RPC Validator
- Enter your URL
- Should show: “Error / 403 Forbidden”
[Screenshot: Validator showing disabled status]
Test 2: Browser Access
Visit: https://yourdomain.com/xmlrpc.php
Should show: “403 Forbidden”
[Screenshot: 403 error in browser]
Test 3: Security Plugin
Check in Wordfence or Sucuri:
- Wordfence: Tools → Diagnostics → XML-RPC Status
- Sucuri: Settings → Hardening
[Screenshot: Security plugin verification]
Test 4: HTTP Headers
Should NOT show: X-Pingback header
[Screenshot: HTTP headers check]
Troubleshooting:
If still enabled:
- Clear all caches
- Try different method
- Check plugin conflicts
- Contact hosting support
Conclusion
XML-RPC is outdated and dangerous. With the REST API available, there’s no reason to keep it enabled.
Next Security Steps:
- Install security plugin (Wordfence/Sucuri)
- Enable two-factor authentication
- Use strong passwords
- Keep WordPress updated
- Install SSL certificate
- Set up backups
- Use firewall (Cloudflare)